What comes in the box with BIT Dashcam?
BIT Dashcam comes with everything you need to install, protect, and use it, including required materials for e-logs.
Alcohol Pad
Use to wipe clean all surfaces where you plan to install a camera or cable clip to get the best adhesion.
Bracket Mount
Install the bracket on your vehicle's windshield before attaching the main camera unit.
The camera should be installed at or above driver eye level, with the lens housing pointing out and slightly down at the road.

Cable Clips
Four (4) cable clips are included to help route and secure camera power cables.

Allen Wrench
Use this wrench for adjusting the secondary camera and tightening the housing screw to keep it in place.

Screwdriver
The screwdriver can be used to secure the tamper cover or tamper lock on the side of the main camera.

Tamper Cover
This cover snaps into place over the SIM and SD card slots to protect them from dust and debris. You can secure it with a screw.

Tamper Lock Set
This cover for the SIM and SD card slots is lockable so the cards are protected and can't be removed without a key or screwdriver.

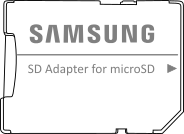
Samsung SD Card Adapter
Use the SD card adapter to manually retrieve video and image files from your Dashcam's microSD card. The adapter should be compatible with most PCs and devices.
Video and image files are located in the folder "DVRMEDIA".

Extra Adhesive Pad
In case you need to reinstall your Dashcam in another position or vehicle, you can use the provided extra adhesive pad on the bracket mount.
BIT Dashcam Quick Start Guide
This guide has all the information you need to install and set up your BIT Dashcam, and a scannable QR code that opens the BIT Dashcam knowledge base in your browser if you have more questions.
ELD Required Documents and Stickers
If you're using BIT Dashcam as your ELD, you will need to keep the provided BIT ELD Adapter Installation Guide & Condensed User Manual and Blue Ink Tech app DOT Inspection Sheet in your cab at all times.
Also included are two BIT ELD door stickers for your vehicle.
Secondary Camera
BIT Dashcam supports a secondary camera. The standard BIT Dashcam comes with an external secondary camera that plugs into the main body of the dashcam with an 8 foot long cord. The secondary camera can be mounted anywhere inside the vehicle (it is not rated for outdoor use, though an optional weather-rated secondary camera is available upon request). It comes with its own mounting adhesive strip and can be articulated into any orientation. Users can optionally leave this camera unconnected if they don't want to use it or use it to cover their blind spot, looking into a mirror, or anywhere else they would like extra coverage.
While we do offer a version of the BIT Dashcam that has the secondary camera embedded in the main body of the dashcam that looks toward the inside of the vehicle, this is not the standard offering and is only available by request.